
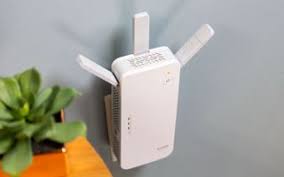
D’Link DAP 1720 WiFi range extender is meant to enhance the range of existing router’s WiFi to great extent. When the extender is set up in a successful manner, users are all set to enjoy the high-speed yet boosted internet range all over their house. Despite the fact, the device in discussion is prone to technical issues. And, one of the common yet major issues that 90 percent of users usually face is that they are unable to perform D’Link DAP 1720 setup spotify.com/pair.
If you are also sailing on the same boat, then we have a rescue plan for you. In this article, we have jotted down a number of effective fixes that will help you set up your WiFi range extender in an instant. Let’s start over!
Don’t scroll away if you don’t own D’Link DAP 1720 extender. This piece of writing will help in any manner to fix setup-related issues of any D’Link DAP extender model. Continue reading!
Why Can’t I Set Up D’Link DAP Extender?
Wait! Before we help you with the fixes to troubleshoot the issue, let us provide you a couple of reasons that might have led you to experience it.
You will not be able to set up D’Link DAP extender if:
- There is no connection between it and your host router
- It is placed at a distance from your existing device i.e. the router
- You have not followed the setup instructions correctly
- There is a sudden power outage or it is not receiving steady power from its respective power socket
- It is prone to a technical glitch
Here “it” we are referring to your D’Link DAP WiFi extender!
Now that you are well aware of the reasons causing the setup-related issue, dig a little deeper and know how to make things work joinmyquiz.
Fix D’Link DAP Setup Issues
Restart Your D’Link DAP Extender
It seems like your WiFi range extender is prone to technical glitches which is why you are unable to set it up. Once of the best ways to get it fixed is to restart it using the instructions outlined below:
- Turn the WiFi extender off
- Wait for 5-6 minutes
- Turn the extender on
In this simple manner, you have made your WiFi range extender free from technical glitches.
Connect Your Extender and Router
To get success with the setup process, you need to make a secure yet finger-tight connection between your WiFi range extender and router. You can easily do this via Ethernet cable – just connect its one end into your router and another end into your WiFi range extender.
Lessen the Router-Extender Distance
On the off chance, you want to connect your WiFi extender and router wirelessly, then you must ensure to keep them at a close distance. Apart from this, you should be certain about your internet connection. It shouldn’t be running at a low speed. Keep in mind, slow internet speed will give you issues while connecting your router and extender wirelessly and also setting up the D’Link DAP extender.
Yes! Slow or poor internet is one of the most common reasons behind getting setup-related issues.
Check the Power Supply
Now, you need to have a quick nudge on the wall socket (in which your extender is plugged) and the power supply (whether your extender is receiving it continuously or not).
Bear in mind, poor and uninterrupted power supply or using a damaged wall socket can give you issues while setting up the extender. To rectify this, all you have to do – ensure that your extender is not operating on uninterrupted power. That’s it!
Follow the Correct Instructions
You might be having issues while performing the setup process of your WiFi range extender if you are not following the instructions carefully. So, to make the most out of your extender, access the D’Link DAP setup page via dlinkap and follow the setup instructions in the exact way they are provided hulu.com/activate.
In the first place, read the setup instructions very carefully ensuring you won’t miss even a single instruction!